Best Seeds for Beginners: Avoid Common Seed Starting Mistakes and Create Your Cost-Effective Urban Garden
Starting a cost-effective garden can be easy and fun for urban dwellers. You can grow your own plants from seeds, which saves money and brings life to your space. This guide shows you how to choose the best seeds for beginners and offers tips on seed-starting, DIY garden tools, and upcycled planters. Discover the best seeds for beginners and learn how to effortlessly start your cost-effective urban garden.
Choosing the Best Seeds for Beginners
Why Start with Easy-to-Grow Seeds?
When you begin your gardening journey, it helps to choose seeds that are simple to grow. Easy-to-grow seeds boost your confidence and increase your chances of success. Imagine planting a seed and watching it sprout without too much fuss!
Some excellent beginner-friendly seeds include herbs like basil and parsley, leafy greens such as lettuce and spinach, and root vegetables like radishes. These plants thrive in various conditions, making them perfect for urban gardens. Plus, they grow quickly, so you won’t have to wait long to see results (and enjoy a tasty salad!).

How to Start Seeds Indoors: A Step-by-Step Guide
Setting the Stage for Success Indoors
Now that you know which seeds to choose, let’s talk about how to start seeds indoors. Follow this step-by-step guide to create an inviting environment for your plants, even if you live in a small apartment.
Prepare Your Containers: You can use anything from egg cartons to yogurt cups as planters. Just make sure to poke small holes at the bottom for drainage. (No one wants a soggy seed!)
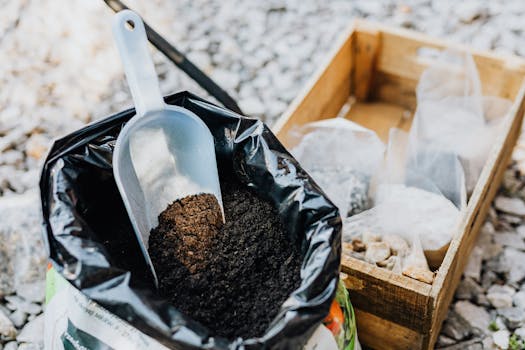
Choose the Right Soil: Purchase seed-starting soil or make your own by mixing equal parts peat moss, vermiculite, and compost. This mix gives seeds the right nutrients without being too heavy.
Plant Your Seeds: Follow the instructions on your seed packets for planting depth. A general rule is to plant seeds twice as deep as their diameter. For tiny seeds like lettuce, just sprinkle them on top and press lightly.
Light it Up: Seeds need light to grow strong. Place your containers in a sunny window or use grow lights. (Think of it as giving your seeds a cozy sunbath!)
Water Gently: Mist the soil to keep it moist. Overwatering is a common mistake. Allow the top of the soil to dry out slightly between waterings.
Fertilize with Care: Once your seedlings have a few true leaves, start feeding them with a diluted organic fertilizer. This helps them grow healthy and strong.
Repot When Necessary: If your seedlings outgrow their containers (which they might do quickly), it’s time to repot them into larger pots. Just be sure to label them, so you don’t mix up your herbs with your tomatoes!

Avoiding Common Seed Starting Mistakes
Troubleshooting Your Seed Starting Journey
Starting seeds can be tricky, but many common mistakes can be avoided. Here are some tips to help you steer clear of these pitfalls.
Overwatering: This is the most common mistake. Ensure your containers have drainage holes to prevent soggy soil. If your soil looks wet but your seeds aren’t sprouting, hold off on watering for a bit.
Improper Lighting: Without enough light, your seedlings can become “etiolated,” which means they grow tall and leggy in search of light. If you notice this happening, move your plants closer to the light source or invest in some grow lights.
Incorrect Planting Depth: Planting seeds too deep or too shallow can lead to poor germination. Follow the instructions on the seed packet, and remember that smaller seeds usually need less depth.
Ignoring Temperature: Seeds need warmth to germinate. Most seeds germinate best at temperatures between 65°F and 75°F (18°C to 24°C). If your home is chilly, consider using a seedling heat mat.
By keeping these tips in mind, you can avoid frustrating setbacks and ensure a smoother growing experience.
Understanding the Seed Germination Process and Times
Timing is Everything
Understanding seed germination times is crucial for planning your garden. Each type of seed has a different germination period. Some might sprout in just a few days, while others take weeks. Here’s a simple chart of germination times for some popular beginner seeds:
| Seed Type | Germination Time |
|---|---|
| Basil | 5-10 days |
| Radish | 3-5 days |
| Lettuce | 7-14 days |
| Spinach | 7-14 days |
| Tomato | 5-10 days |
Keep this chart handy to help you schedule your planting. If you know a particular seed takes longer, you can start it earlier. Planning ahead lets you enjoy a steady harvest instead of a sudden rush. (It’s like pacing yourself at a buffet!)

Organic Seed Starting Methods for the Eco-Conscious Gardener
Nurturing Your Garden the Natural Way
If you’re passionate about the environment, consider organic seed starting methods. These techniques avoid harsh chemicals and promote a healthier garden ecosystem.
Use Organic Seed-Starting Mix: Instead of conventional mixes, choose organic options. You can even make your own by mixing peat moss, compost, and perlite.
Create a Natural Fertilizer: Compost is a fantastic way to feed your plants without chemicals. You can make compost at home by collecting kitchen scraps like vegetable peels and eggshells.
Practice Crop Rotation: Changing where you plant your seeds each year helps prevent pests and diseases. This is an easy way to keep your garden healthy.
Encourage Beneficial Insects: Plant flowers that attract pollinators and beneficial insects. Marigolds and borage are great choices that help keep pests away.
By using organic methods, you support a sustainable ecosystem while growing your plants. Plus, your garden will be a safe space for pets and children to enjoy.
In summary, seed viability and germination is achievable with the right seeds and methods. By choosing easy-to-grow seeds, setting up your indoor garden correctly, avoiding common mistakes, understanding seed germination, and using organic methods, you can cultivate a thriving green space that fits your budget. Happy gardening!
FAQs
Q: How can I avoid common mistakes when starting seeds indoors, especially when choosing the best seeds for beginners?
A: To avoid common mistakes when starting seeds indoors, choose seeds that are known to be easy for beginners, such as herbs and leafy greens like lettuce. Additionally, ensure proper light conditions, use suitable seed-starting methods like pots or the paper towel method, and follow specific germination instructions for each seed type to ensure success.
Q: What are some effective methods for testing seed viability, and how do I know which seeds are still good for planting?
A: To test seed viability, place a small sample of seeds between damp paper towels in a plastic bag and keep them in a warm, light location. If more than half germinate within two weeks, the seeds are likely still good for planting. Additionally, seeds should be stored in cool, dry conditions to maintain their viability.
Q: Can you explain the step-by-step process of germinating seeds, and how does this differ for various types of beginner-friendly plants?
A: To germinate seeds, start by storing them properly and ensuring they have adequate moisture and warmth. Typically, soak seeds in water if needed, then plant them in suitable soil at the correct depth, ensuring the soil remains moderately moist but not waterlogged. The germination process can vary: while most vegetable seeds germinate within days, some, like certain perennials, may require a cold stratification period before they sprout. Additionally, some seeds, such as lettuce, need light for germination, while others, like beans, do not.
Q: When is the ideal time to collect seeds, and how does this impact their germination and growth when I’m starting out as a beginner?
A: The ideal time to collect seeds is when they are fully mature, which is typically indicated by changes in color and texture. Collecting seeds at the right time ensures better viability and can significantly improve germination rates, ultimately leading to healthier plants as you start your gardening journey.