How to Grow Herbs from Seeds: A Frugal Urban Dweller's Guide to DIY Gardening Tools and Upcycled Planters
Growing your own herbs can be a rewarding way to bring some green into your urban lifestyle. It is easy to start a cost-effective garden right in your apartment, even if you have limited space. You can learn how to grow herbs from seeds using simple methods and upcycled materials. This guide will show you how to save money while creating a beautiful and functional herb garden in your home.
How to Grow Herbs from Seeds: A Frugal Urban Dweller’s Guide to DIY Gardening Tools and Upcycled Planters
The Basics of Growing Herbs from Seeds
Key Takeaway: Growing herbs from seeds is easy and rewarding, even for beginners.
When you want to grow herbs from seeds, the first step is understanding what you need. Start by choosing the right seeds. Some easy herbs for beginners include basil, mint, and parsley. These herbs grow well in small spaces and are useful in cooking.
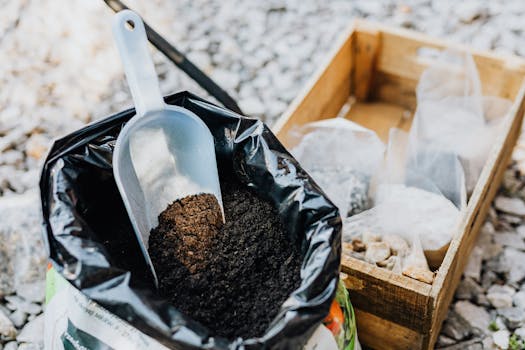
What is seed starting? Seed starting is the process of planting seeds in a suitable environment so they can grow into plants. To start, you need to prepare your planting area. Make sure you have a good soil mix. A mix that contains peat moss, vermiculite, and perlite works well. This combination helps with drainage and keeps soil moist.
Common Mistakes: Many newcomers make the mistake of using garden soil instead of a proper seed-starting mix. Garden soil can be too heavy and may lead to poor growth. Instead, always use a light seed-starting mix. Another mistake is not providing enough light. Herbs need sunlight or artificial light to grow strong. If you don’t have enough natural light, consider using LED grow lights to help your plants thrive.
Actionable Tips:
- Choose Easy-to-Grow Herbs: Start with basil, mint, or parsley.
- Use a Good Soil Mix: Look for mixes with peat moss and perlite.
- Provide Adequate Light: Use natural sunlight or LED grow lights.

DIY Seed-Starting Tools for the Budget-Conscious Gardener
Key Takeaway: You can save money by making your own gardening tools.
Buying gardening tools can get expensive. Instead, you can create your own tools at home. This not only saves money but also lets you be creative!
What are some DIY seed-starting tools? One great tool is a seed tray made from an egg carton. Here’s how to make one:
- Collect Egg Cartons: Use empty cardboard egg cartons.
- Cut and Prepare: Cut the carton in half. Each half can hold seeds in its cups.
- Fill with Soil: Fill each cup with your seed-starting mix.
- Plant Your Seeds: Plant one seed in each cup and water lightly.
Another handy tool is a mini-greenhouse made from plastic bottles. Here’s how:
- Get a Plastic Bottle: Use an old two-liter soda bottle.
- Cut it Open: Cut the bottle in half.
- Plant Your Seeds: Place soil and seeds in the bottom half.
- Cover with the Top Half: Use the top half to cover the bottom half. This creates a humid environment for your seeds.
Actionable Tips:
- Make Seed Trays from Egg Cartons: Easy and effective for starting seeds.
- Create Mini-Greenhouses: Use plastic bottles to keep seeds warm and moist.
Upcycled Planters: Giving New Life to Old Items
Key Takeaway: You can create chic planters from everyday items.
Urban living often means limited space. However, you can still grow a beautiful herb garden using upcycled planters. This method helps the environment and saves you money!
What are upcycled planters? Upcycled planters are containers you repurpose to grow plants. Instead of buying new pots, look around your home for items you can use. Here are some creative upcycled planter ideas:
Tin Cans: Clean out old food cans, punch holes in the bottom for drainage, and paint them to add color.
Plastic Bottles: Similar to the mini-greenhouse, cut the bottle in half and use the bottom as a planter. These upcycled planters are a fantastic way to save money while gardening.
Mason Jars: Use mason jars for small herbs like chives or basil. They look stylish and are easy to manage.
Wooden Crates: Find old wooden crates and use them for vertical gardening. Stack them to save space and create a rustic look.
Pain Points/Solutions: If you lack outdoor space, consider vertical gardening. You can hang planters on walls or use shelves to keep your herbs off the ground. This not only saves space but also adds a decorative touch to your home. For more tips on maximizing small spaces, check out our budget-friendly gardening ideas.
Actionable Tips:
- Use Tin Cans for Small Herbs: They are easy to decorate and use.
- Repurpose Mason Jars: Great for small indoor herb gardens.
- Create Vertical Gardens with Wooden Crates: Ideal for limited space.

Nurturing Your Herb Garden Sustainably
Key Takeaway: Keep your herb garden healthy with simple maintenance tips.
Once your herbs start growing, it’s crucial to take care of them. This section will help you nurture your garden sustainably.
Common Challenges: Urban gardens can face problems like pests and not enough sunlight. To combat pests, make a homemade pest repellent using ingredients like garlic and water. Here’s a simple recipe:
- Combine Ingredients: Blend 2 cloves of garlic with 1 cup of water.
- Strain the Mixture: Strain the liquid into a spray bottle.
- Spray on Plants: Use it to spray your plants every week to deter pests.
Lighting Solutions: If your herbs are not getting enough sunlight, consider using LED grow lights. They are energy-efficient and can be adjusted to provide the right amount of light for your plants.
Actionable Tips:
- Make Homemade Pest Repellent: Use garlic and water to keep pests away.
- Use LED Grow Lights for Extra Sunlight: Helps herbs grow strong in dark spaces.

Conclusion: Cultivate Your Urban Green Space
Starting your herb garden does not have to be costly or complicated. By following these steps, you can grow delicious herbs from seeds using DIY tools and upcycled planters. Remember, a little creativity goes a long way in making your urban space greener. So, gather your materials, plant those seeds, and enjoy the journey of nurturing your own vibrant herb garden! Happy gardening!
FAQs
Q: Why are my herb seeds not germinating, and how can I improve their success rate?
A: Herb seeds may not be germinating due to factors such as inadequate moisture, incorrect temperature, or lack of light. To improve their success rate, ensure the seeds are sown in good-quality seed compost, keep the soil moist but not waterlogged, and provide the appropriate warmth and light conditions for the specific herb variety you are growing.
Q: What are the best indoor conditions to ensure my herb seedlings thrive before transplanting them outside?
A: To ensure your herb seedlings thrive indoors before transplanting them outside, maintain a temperature between 67°F and 70°F, provide strong light for 6 to 8 hours a day, and allow the soil to dry out between infrequent waterings. Additionally, avoid direct strong sunlight to prevent them from becoming leggy and ensure adequate airflow around the seedlings.
Q: How can I prevent common pests and diseases that affect young herb seedlings?
A: To prevent common pests and diseases that affect young herb seedlings, ensure good gardening practices such as clearing away debris, promptly removing diseased leaves, and avoiding over-watering. Additionally, keep young seedlings well-spaced and maintain a clean environment to minimize the risk of infestation.
Q: What are the signs that my herbs are ready to be transplanted, and what should I consider when moving them outdoors?
A: Herbs are typically ready to be transplanted when they have developed a strong root system and multiple sets of true leaves. When moving them outdoors, consider the last frost date in your area and ensure the plants are hardened off to acclimate them to their new environment, reducing transplant shock.
Additionally, consider organic seed saving techniques to maintain your herb varieties for future planting.