Transplanting Seedlings: Best Practices for Frugal Urban Gardeners Using DIY Tools and Upcycled Planters
Transforming your small urban space into a green oasis is possible without spending a lot. This guide shows you how to transplant seedlings, which is a key step in starting your cost-effective garden. You will learn why transplanting seedlings matters, how to use DIY tools, and discover creative upcycled planters to grow your plants. Whether you have a balcony or a tiny yard, you can cultivate a thriving garden that fits your budget.
Understanding the Basics of Transplanting Seedlings
Key Takeaway: Timing is crucial when transplanting seedlings. It helps ensure your plants grow strong and healthy.
Transplanting seedlings is not just a task; it’s a vital step in your gardening journey. Understanding when and how to do it makes a big difference. The best time to transplant seedlings is when they are about 2-4 inches tall and have at least two sets of true leaves. These true leaves are the second set that appears after the first, tiny leaves. They look different and indicate your seedling is ready for a new home.
Why is Timing Important? When you transplant too early, seedlings may not be strong enough to survive. If you wait too long, they might become root-bound, meaning their roots are too cramped to grow properly. This can lead to stunted growth or even death.
To help keep track of when to transplant, use a calendar or gardening app. Mark the dates when you planted your seeds and when you expect them to be ready for transplanting. This way, you avoid guessing and ensure your plants thrive.

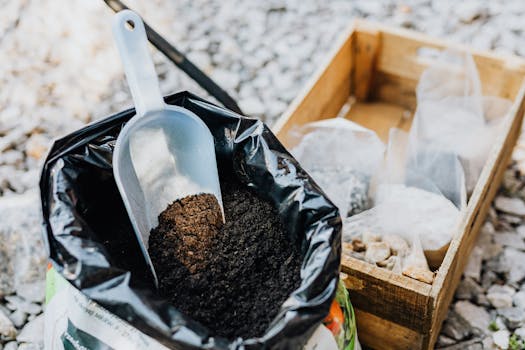
DIY Garden Tools for Successful Transplanting
Key Takeaway: You can create effective gardening tools from items you already have at home.
When starting your garden, you don’t need to spend a lot on fancy tools. Instead, look around your home for items you can turn into DIY garden tools. This not only saves money but also adds a personal touch to your gardening experience.
Crafting Tools: A dibber is a simple tool that makes holes in the soil for your seedlings. You can make one easily from a sturdy stick or even a pencil. Just sharpen one end to create a point.
A transplanting trowel can be made from old spoons or plastic containers. Cut the container to create a scoop shape, and you have a perfect tool for moving soil and planting seedlings.
Step-by-Step Guide:
- Dibber: Find a sturdy stick or pencil. Sharpen one end to a point.
- Transplanting Trowel: Cut an old plastic container into a scoop shape. Smooth any sharp edges with scissors.
These tools are lightweight and easy to use, making your transplanting process smoother and more enjoyable.
Upcycled Planters: Sustainable Choices for Urban Gardens
Key Takeaway: Upcycling items into planters is a smart way to save money and help the environment.
Urban gardeners often face space constraints. Upcycled planters are a fantastic solution, allowing you to create a green space with items you already have.
Creative Ideas for Upcycled Planters:
- Milk Jugs: Cut the top off a clean milk jug, fill it with soil, and plant your seedlings. The jug can retain moisture and protect young plants from pests.
- Tin Cans: Use empty tin cans as planters. Just make sure to poke holes in the bottom for drainage. You can even decorate them with paint or fabric to make them look nice.
- Old Furniture: Turn an old dresser or bookshelf into a vertical garden. Fill the drawers with soil and plant herbs or flowers.
Using these upcycled items not only saves money but also gives your garden a unique look. Plus, it’s a great conversation starter when friends come over!
For those interested in further enhancing their urban gardening skills, consider checking out some sustainable urban farming tips that can help you make the most of your growing space.
Additionally, consider incorporating budget-friendly gardening tips into your urban gardening efforts for even greater sustainability. 
Overcoming Common Seedling Transplant Challenges
Key Takeaway: Many urban gardeners face challenges, but there are simple solutions to overcome them.
Urban gardening comes with its own set of challenges. Limited sunlight, small spaces, and poor soil quality can hinder your efforts. But don’t worry, many cheap gardening tips can help your seedlings thrive.
Addressing Limited Sunlight: If your garden doesn’t get enough sun, consider using reflective surfaces. Mirrors or white walls can bounce light onto your plants. You can also grow plants that thrive in low-light conditions, like leafy greens and herbs.
Dealing with Small Spaces: Vertical gardening is a great way to maximize your space. Use wall planters, hanging baskets, or even a ladder to create a tiered garden. This method allows you to grow more plants without taking up extra ground space.
Improving Soil Quality: If your soil isn’t ideal, mix in compost to enrich it. You can make compost at home using kitchen scraps like vegetable peels and coffee grounds. This not only improves your soil but also reduces waste (two birds with one stone!).
Case Study: Take inspiration from urban gardeners who successfully navigated these challenges. One gardener used a small balcony and vertical planters to grow tomatoes and herbs. They installed a trellis against the wall to support their plants, maximizing both sunlight and space.

Cultivate Your Urban Oasis with Transplanting Seedlings
In summary, mastering the art of transplanting seedlings is essential for a thriving urban garden. By understanding the timing of transplanting, creating DIY tools, and utilizing upcycled gardening planters, you can cultivate a lush green space without spending a fortune.
Remember, urban gardening is not just possible; it can be a rewarding and enjoyable experience. So, grab those seedlings, make your tools, and get started on your journey to a beautiful urban garden!
(And who knows? You might end up with the tastiest tomatoes on the block!)
FAQs
Q: How can I tell if my seedlings are ready to be transplanted, and what signs should I watch out for to ensure they thrive in their new environment?
A: Seedlings are ready to be transplanted when they have developed a few true leaves and are large enough to handle comfortably. Look for signs of crowding or legginess, which indicate they need more space, and ensure the tiny root hairs are intact and moist to help them thrive in their new environment.
Q: What are the most common mistakes people make when transplanting seedlings, and how can I avoid them to ensure my plants stay healthy?
A: Common mistakes when transplanting seedlings include damaging the seed leaves and roots during the process, and allowing the seedlings to dry out. To avoid these issues, transplant seedlings when they’re small enough to handle, water them well beforehand, and handle them carefully by the leaves to preserve the roots. Ensure they are planted at the same depth they were growing and avoid transplanting in very hot conditions to reduce stress.
Q: How do I acclimate my seedlings to outdoor conditions before transplanting, and why is this step crucial for their survival?
A: To acclimate your seedlings to outdoor conditions, gradually expose them to the elements over two to three weeks, starting with short periods in the shade and progressively increasing their time outdoors and exposure to sunlight. This step is crucial because it helps seedlings develop protective mechanisms against sunburn and environmental stress, reducing the risk of damage or shock when transplanted.
Q: What specific soil conditions and amendments should I prepare in advance to give my seedlings the best start in their new location?
A: To give your seedlings the best start, prepare well-draining soil that is rich in nutrients, ideally using a mix of loamy soil, peat, and sharp sand. Amend the soil with organic matter, such as compost, and ensure it is slightly moist but not waterlogged to promote healthy root development.