When to Take Plant Cuttings: A Step-by-Step Guide for Frugal Urban Gardeners
Transform your urban space into a green oasis without spending a lot of money. Taking plant cuttings is a simple and budget-friendly way to grow your garden. In this guide, you will learn when to take plant cuttings to boost your gardening success. Discover practical tips on seed-starting, DIY tools, and upcycled planter ideas that help you cultivate a thriving garden at home.
Understanding the Best Time to Take Plant Cuttings
Timing is Everything: Seasonality and Plant Growth Stages
When you want to multiply your plants, understanding the best time to take cuttings is essential. The right timing can greatly affect your success. Typically, spring is the best season for most plants. As the weather warms up, plants enter their growth phase, making them more receptive to cuttings.
Softwood cuttings, which are taken from new growth, thrive best in early spring. This is when plants are still pushing out fresh leaves. If you take cuttings during this time, they often root much faster. On the other hand, semi-hardwood cuttings, which come from slightly older, firmer stems, are best taken in mid-summer. By this time, the plant’s growth has slowed down, and the wood is tougher.
Why does timing matter? Well, the plant’s hormones play a significant role in rooting. When you take cuttings at the right time, the plant’s hormones are high, and this increases the odds of successful rooting. Imagine trying to bake a cake without preheating your oven; it just won’t turn out right!

In addition, consider the plant species. For example, many herbaceous perennials root easily from softwood cuttings taken in spring. Shrubs often respond well to both softwood and semi-hardwood cuttings. However, trees can be trickier. Most trees do not root easily, so it is best to avoid taking cuttings from them unless you’re feeling particularly adventurous.
Avoiding Common Mistakes in Plant Cuttings
Common Mistakes When Growing Plants from Cuttings and How to Avoid Them
Even experienced gardeners make mistakes when taking cuttings. One common error is not using the right tools. Dull scissors or shears can crush the cutting, making it harder to root. Always use clean, sharp tools.
Another mistake is taking cuttings from unhealthy plants. It’s like trying to build a house on a shaky foundation. If the parent plant is sick, the cuttings will likely struggle. Make sure to choose healthy plants with strong, green stems for the best results.
Environmental conditions also play a role. If you place your cuttings in a spot that’s too hot or too cold, they may not survive. A warm, humid environment is ideal. You can create this with a simple DIY mini greenhouse using a plastic bag or a clear container. Just remember to keep the cuttings out of direct sunlight to avoid overheating.
Additionally, people often forget to keep their cuttings moist. Since the severed stems can dry out quickly, it’s essential to water them regularly. If you can’t plant them right away, store them in a plastic bag in the fridge to keep them fresh, like you would with leftover pizza (which should definitely be eaten later, not forgotten!).
Step-by-Step Guide to Taking Plant Cuttings
From Shears to Soil: A Step-by-Step Guide to Plant Cuttings
Now that you understand the timing and common mistakes, let’s get to the nitty-gritty of taking cuttings. Here’s a simple step-by-step guide:
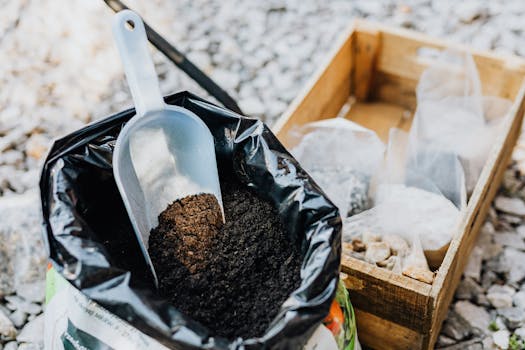
Gather Your Tools: You’ll need clean, sharp scissors or garden shears, a small pot or container, and some good-quality potting soil. If you’re looking to save money, you can use recycled containers like yogurt cups or old tins as planters.
Select Your Cutting: Look for healthy stems or shoots on the plant. For softwood cuttings, pick new growth that is around 10-15 cm (4-6 inches) long. For semi-hardwood cuttings, choose older stems that are firm but still green.
Make the Cut: Cut just below a leaf node, where growth hormones are concentrated. This is where new roots will start to form. If you are cutting from hardwood plants, make sure the cutting is a bit longer, as they need more energy stored in them to root.
Prepare the Cutting: Strip off the lower leaves to prevent them from rotting in the soil. If the leaves are large, trim them in half to reduce water loss.
Use Hormone Rooting Powder: Dip the cut end into hormone rooting powder. This can help speed up the rooting process, especially for tougher plants.
Plant the Cutting: Insert the cutting into the potting soil, ensuring it’s deep enough to stay upright but not buried too deep. Space the cuttings apart so they don’t touch each other.
Water Well: After planting, water the cuttings thoroughly. This will settle the soil around the cutting and provide moisture.
Create a Humid Environment: Cover the pot with a clear plastic bag or place it in a mini greenhouse to keep humidity high. If using a bag, support it with sticks to prevent touching the leaves.
Choose the Right Location: Place your pot in a warm spot with indirect light. Remember, no direct sunlight yet!
Explore Gardening Apps: For novice gardeners looking for additional support, consider checking out gardening app reviews that can provide helpful tips and tools to enhance your gardening experience.
Monitor and Wait: Check the cuttings regularly for moisture. In a few weeks, you should see new growth, which is a good sign that roots are forming.

Using upcycled planters can save you money while being environmentally friendly. You can use old containers, jars, or even egg cartons to start your cuttings. Just make sure they have drainage holes to prevent overwatering.
How to Care for Plant Cuttings After Taking Them
Nurturing New Life: How to Care for Plant Cuttings
After you have taken your cuttings, the next step is to care for them properly. The first thing to remember is that cuttings need a lot of moisture. Keep the soil damp but not soggy. Overwatering can lead to rot, which is a common issue for new gardeners.
Another essential factor is light. Cuttings need bright, indirect light to grow. Too much direct sun can scorch the leaves, while too little light can slow down the rooting process. A bright windowsill works well, but if it’s too sunny, consider using sheer curtains to filter the light.
Temperature is also crucial. Most cuttings prefer a warm environment, ideally between 20-25°C (68-77°F). If you live in a cooler area, you can place a small heating mat under the pot to maintain warmth. Just be careful not to overheat them, as this can cause more harm than good.
You can also use common household items to help maintain the health of your cuttings. For instance, misting the leaves with water can increase humidity. Alternatively, placing a small dish of water near the cuttings can help create a humid microenvironment. (Think of it as a spa day for your plants!)

Lastly, keep an eye out for signs of success. If you notice new leaves sprouting, that’s a fantastic sign that roots have formed. Once the cuttings are well-rooted, you can transplant them into larger pots or directly into your garden. Just be sure to harden them off first by gradually exposing them to outdoor conditions.
Actionable Tips/Examples: Real-Life Success Stories and Practical Tips
Many urban gardeners have successfully multiplied their plants through cuttings. For example, one city gardener took cuttings from her grandmother’s favorite rose bush. By following the right steps and timing, she managed to grow several new rose bushes at no cost! She used old coffee cans as planters and kept them in her sunny kitchen window.
Another gardener wanted to create an herb garden. He used cuttings from friends’ basil and mint plants. He mixed potting soil with compost he made at home, which provided nutrients for the cuttings. Within weeks, he had fresh herbs growing on his balcony, ready for his next culinary adventure.
To create your own cost-effective setup, consider using recycled containers as planters. Containers like plastic bottles, yogurt cups, or even wooden crates can work well. Just remember to poke holes in the bottom for drainage. With a little creativity, you can cultivate a thriving garden without spending a lot of money.
Through these real-life examples, it’s clear that anyone can start their own garden using plant cuttings. The key is to be patient and follow the guidelines laid out in this article. Before you know it, you’ll have a beautiful collection of plants that didn’t cost you a dime!
FAQs
Q: How can I determine the best time of year to take cuttings for different types of plants, and what are the signs that a plant is ready for cutting?
A: The best time to take cuttings varies by plant type: softwood cuttings are typically taken in spring when new growth is soft and green, semi-hardwood cuttings in mid-summer when stems start to harden, and hardwood cuttings in late fall or winter when the plant is dormant. Signs that a plant is ready for cutting include new growth that is flexible for softwood, a transition to stiffer stems for semi-hardwood, and fully matured, dark stems for hardwood cuttings.
Q: What are the most common mistakes people make when taking cuttings, and how can I avoid them to ensure successful growth?
A: Common mistakes when taking cuttings include using scissors instead of a sharp knife, which can seal the end of the stem and hinder root growth, and failing to maintain adequate moisture, leading to dehydration. To avoid these issues, use a sharp knife for clean cuts and keep cuttings in controlled conditions, regularly misting the leaves to prevent moisture loss.
Q: After taking plant cuttings, what are the essential steps I should follow to care for them and promote healthy root development?
A: After taking plant cuttings, ensure they are placed in a moist environment, ideally covered with a plastic bag to maintain humidity while avoiding condensation on the leaves. Use a free-draining compost, water them well, and keep them in a warm, bright location out of direct sunlight to promote healthy root development.
Q: What are the specific environmental conditions and tools I need to create an optimal setting for my plant cuttings to thrive?
A: To create an optimal setting for plant cuttings, maintain a humid atmosphere with good air circulation, avoiding direct sunlight. Use clear plastic covers to trap moisture, along with heating mats for bottom warmth, and ensure tools and pots are clean to prevent disease.
Additionally, consider incorporating practical gardening strategies to sustain your plants during colder months.